MOTO
As soon as
you go near dustbin the door of the dust bin will open automatically

COMPONENTS
REQURIED
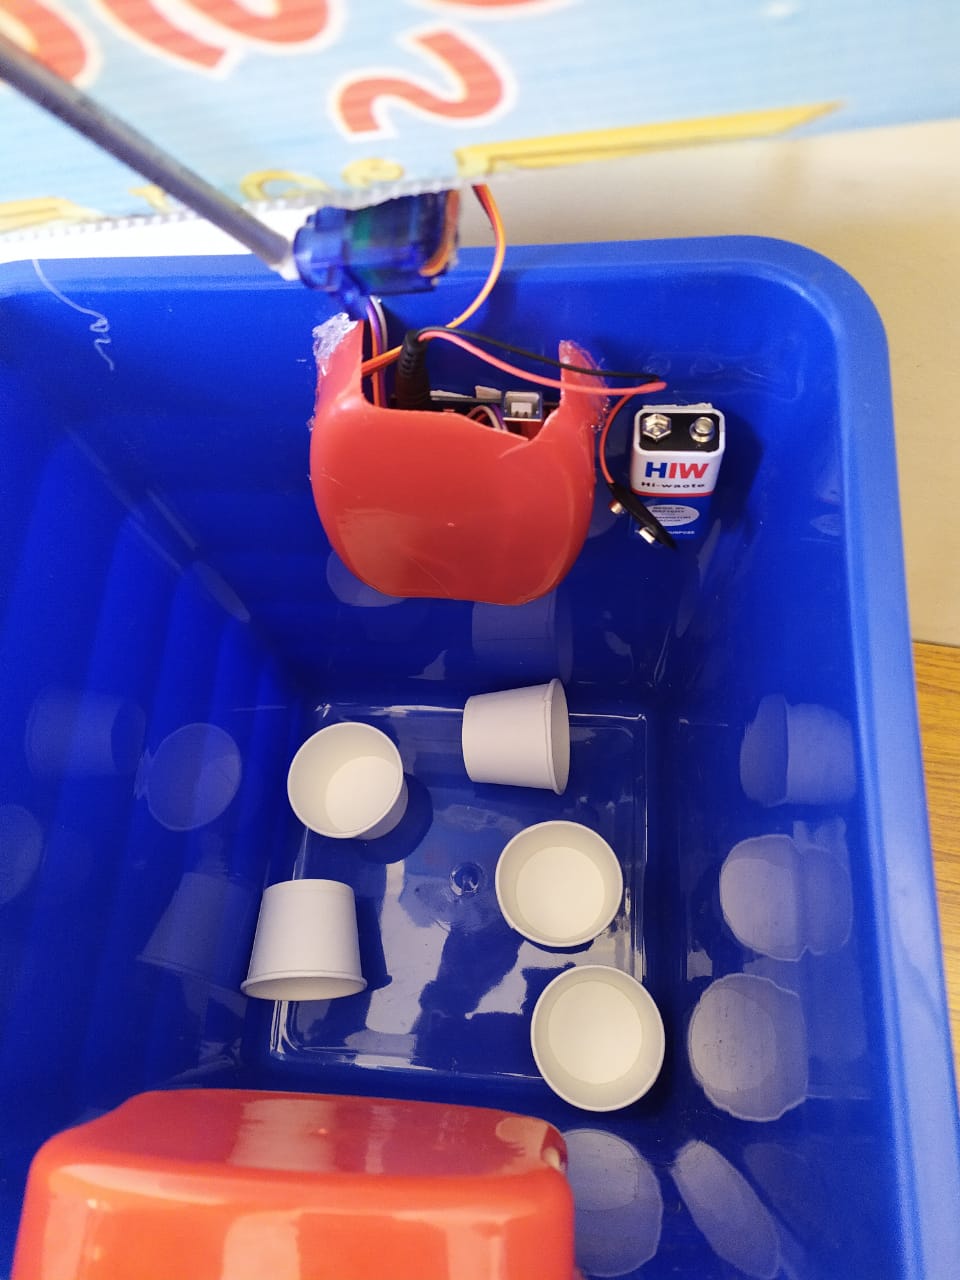
- Ø Dustbin
- Ø Arduino uno board
- Ø Servo motor
- Ø Ultrasonic sensor
- Ø Jumper wires
- Ø Double sided foam tape
- Ø 2 Soap boxes
- Ø 9V battery
- Ø Sun board
STEPS
- v Take a dustbin and make 2 holes at
one side of the dustbin as the ultrasonic sensor fits into it.
- v Place the sensor from inside the
dustbin and connect the jumper wires to all the pins
- v Cover the ultrasonic sensor with soap
box so that dust you put into dustbin will not affect the sensor
- v Connect the ultrasonic as follows
- o
Connect
the ground of sensor to the ground of Arduino board
- o
Connect
the VCC of sensor to the 5V on Arduino board
- o
Connect
the trig pin to the digital pin 8 in Arduino board
- o
Connect
the echo pin to the digital pin 9 in Arduino board
- v Now paste Arduino board to dustbin
- v Take the sun board and cut it as
shape and size of the top of the dustbin and paste it with cello tape on top
side
- v Cut the sun board to ¾ of its length
- v Paste the servo motor to that ¾ piece
of the sun board by Double sided foam tape
- v Take single side fan stick of servo
motor and stick a strong material to it to flip the door of dustbin
- v Place it to servo motor
- v Now connect the servo motor to the
Arduino uno board as follows
- o
Connect
the brown wire of servo motor to ground
- o
Connect
the red wire to the Vin
- o
Connect
the yellow wire to the digital pin 7
- v Cover the Arduino board with soap box
leaving the power connecting pin and USB port
- v Now paste the 9V battery with Double
sided foam tape
- v Upload the following code to the
Arduino uno board
- v Now connect the 9V battery to Arduino
uno board
- v Paste the prepared sun board to the
top of the dustbin
- v Now your SMART DUSTBIN is ready
Circuit

CODE
#include
<Servo.h>
Servo
servo1;
int trigPin
= 9;
int echoPin
= 8;
long
distance;
long
duration;
void setup()
{
servo1.attach(7);
pinMode(trigPin, OUTPUT);
pinMode(echoPin, INPUT);
}
void loop()
{
ultra();
if(distance <= 100){
servo1.write(90);
delay(5000);
}
else
servo1.write(0);
}
void
ultra(){
digitalWrite(trigPin, LOW);
delayMicroseconds(2);
digitalWrite(trigPin, HIGH);
delayMicroseconds(10);
digitalWrite(trigPin, LOW);
duration = pulseIn(echoPin, HIGH);
distance = duration*0.034/2;
}


No comments:
Post a Comment